- Sign In
- |
- Sign Up
- |
- My Quote (0)
- |
- CART (0)

Powerful and easy to use, this soldering station heats the iron quickly and provides a faster recovery time. In addition, featuring a digital LCD to monitor preset levels, temperature stability and lock, standby mode, and auto setback, this soldering station is lightweight to allow for increased control while working.
Powerful and easy to use, this soldering station heats the iron quickly and provides a faster recovery time. In addition, featuring a digital LCD to monitor preset levels, temperature stability and lock, standby mode, and auto setback, this soldering station is lightweight to allow for increased control while working.
Power and User-Friendly
Maximum Protection
Power Station
A 70-watt (W) power station that gives you the power you need to consistently produce high-quality results. The power station is 40% more powerful than the WES/WESD station, making it a substantial upgrade. This increased power heats up the iron faster and also provides faster recovery time, which enables you to work more efficiently and precisely.
Soldering Iron
This powerful tool is capable of reaching high temperatures but is also lightweight, allowing for increased control over your work. It's designed in the soldering pencil style and enables highly precise soldering.
Tool-less Tip Change
The soldering iron also makes it easy to change tips. You don't even need any additional tools to do so. You can quickly change out hot tips by turning the plastic knurled nut located on the soldering pencil by hand. This process further increases efficiency and can reduce the time it takes to complete a job.
Ergonomic Handle
The soldering iron features an ergonomic handle designed for more comfortable handling, less hand fatigue and increased precision.
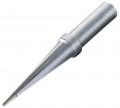
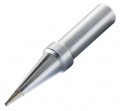
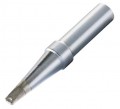
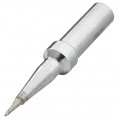
ET Tip Family
The soldering iron works with ET soldering tips and gives you a wide range of tips to choose from, and the ET tips have a long life.
Digital LCD Screen
The power station features an easily readable digital LCD screen that allows you to monitor your preset levels and adjust the operation of your soldering station. The station's intuitive navigation via this screen makes the setup easy to use.
Front Power Switch
The power switch is conveniently located directly on the front of the power station unit, making it easy to quickly start it up and shut it down as needed.
Temperature Stability and Lock
It has excellent temperature stability. The temperature lock feature works to stabilize heat levels and prevent them from wavering. It keeps temperatures at plus or minus 10°F or 6°C of the intended temperature. This enhanced soldering temperature control helps you to create consistent, high-quality solder joints. Having more stable temperatures also helps to protect your components and tips so that they last longer. This temperature assurance enables reliable, repeatable solder results.
Standby Mode and Auto Setback
Includes a standby mode and auto setback feature that helps protect your equipment. When not in use, the it can automatically turn down to a given temperature. This feature saves energy and increases the lifetime of your tips. You can also adjust the time it takes for the device to go into standby mode - from one to 99 minutes.
Password Protection
You have the option of using a password to protect all of your settings. This capability helps you ensure that your settings stay the way you want them and helps you to produce consistent, quality results.
Menu Control Buttons
It is easy to use, thanks in part to its intuitive menu control buttons. The unit features three push buttons. By pressing the menu button, you can scroll through the unit's features and then use the up and down arrows to select your settings. You can use these controls to change the temperature of the adjustable soldering time, choose the time it takes to enter standby mode, lock or unlock the device and more.
Reinforced Safety Rest
Features a reinforced safety rest for securely storing the iron when it's not in use. The safety rest provides extra stability and improves worksite safety by securing the iron in place.
Heat-Resistant Silicon Cable
Comes with a heat-resistant silicon cable that connects the soldering iron to the power station. This cable meets the highest industry standards for mechanical strength and ability to handle overload and stress.
Safety Certifications
The station, iron and cable are all electrostatic discharge (ESD) safe. The station and iron have passed UL and CE inspections and received a Certificate of Compliance for electrical safety.
Professional Use
It is an ideal tool for commercial and industrial uses because of its professional quality. Experienced craftsmen will not be disappointed with the performance of this professional soldering iron kit. It meets and even exceeds many of the standards and specifications that professionals would expect from any comparable soldering station. It empowers you to reliably and efficiently produce high-quality results. This consistent quality will improve your professional reputation, and the efficiencies you can achieve will help your business run smoothly.
Education and Training
It is also a good soldering iron pencil for education and training in settings such as colleges, tech schools, and even high schools. It's easy to use and features numerous safety features that will help prevent incidents in the classroom or during on-the-job soldering iron training while at the same time helping students to learn practical skills. Its relatively small size and light weight also help make it easy to manage in a classroom environment.
Beginners and Hobbyists
This unit is also a good entry-level soldering iron kit, so it's even suitable for hobbyists and DIY enthusiasts. Its ease of use and safety features make it easy for anyone to use it with only basic orientation and a review of safety considerations.
| Power Supply | 120 V/60 Hz |
| Power | 70 W |
| Temperature | Range: 200 to 850°F (100 to 450°C) Accuracy: ±9°F (±5°C) Stability: ±10°F (±6°C) |
| Display | LCD |
| Channels | 1 |
| ESD Safe | Yes |
| Supplied Tip | ETA |
| Dimensions | 5.91 x 4.92 x 3.94" (150 x 125 x 100 mm) |
| Weight | 3.2 lbs (1.4 kg) |

Soldering is a useful skill to have, whether you plan to use it professionally or for DIY projects. A quality soldering iron is one of the most important tools you'll need for your soldering projects.
This guide will provide a brief overview of how to use a soldering iron. It will give you the basics that apply to most soldering work, as well as tips for specific types of projects.
Although all soldering relies on the same principles, the techniques and tools you use may vary depending on the type of materials you're soldering and the kind of outcome you're intending. On this page, we'll cover step-by-step soldering for wiring, printed circuit boards, stained glass and jewelry.
Here's your introductory guide to using a soldering iron.
The fundamentals of soldering are mostly consistent across project types. Below you'll find information about the basics of soldering, descriptions of the equipment involved and a basic step-by-step guide for how to use a soldering iron.
Soldering is a technique for joining metal parts together. It involves melting a metal known as solder into the space between two metal components. When this solder cools and hardens, it forms a permanent connection between the parts. Solder acts as a sort of metallic glue that joins elements together.
Joining electronic components may be the most common use of soldering irons. You can also use them on piping for plumbing, engine components, arts and crafts projects and more.

This article is about how to use a soldering iron, but the iron itself isn't the only item you'll need. Here's a rundown of some of the supplies you may need to use, including a soldering iron, for a soldering project.
Before you begin using your soldering iron, you'll have to make sure that you've taken all the necessary safety measures and prepared your tools.
Health and safety should always be a priority when soldering. Soldering involves extreme heat and toxic substances. While it involves certain risks, if you take the proper precautions, soldering is a relatively safe activity.
Before getting started, read the instructions as well as the health and safety warnings that come with all of your equipment to ensure you're using it correctly. When soldering, wear safety glasses and keep all hair, loose clothing and jewelry secured and out of the way of your tools. You may also want to wear safety gloves.
Be sure that you are working in a well-ventilated area or use a fume extraction device. The fumes from flux are toxic. If the solder you are using contains lead, wash your hands after you're done working with it.

For your soldering iron tip to work correctly, it needs to be clean and tinned. Any contaminants or oxidation will decrease the efficiency with which it conducts heat, making your job harder and reducing the quality of your solder joints.
Before you start soldering, clean the tip of your iron by rubbing it against your cleaning pad. If your tip is badly oxidized, you may need to apply a tip reactivator. After cleaning or reactivating it, it should appear shiny rather than dull.
Tinning the tip of your iron involves coating it with a layer of solder. This practice protects the tip from oxidation and improves its ability to conduct heat. Tin the tip immediately before you begin soldering.
In addition to cleaning and tinning the tip of your iron before each soldering session, you should also do so after every two or three joints you solder and at the end of each soldering project. This will extend the life of your soldering iron tips and improve the quality of your soldering joints.
Once you've completed the above steps, you're ready to solder your components together. The techniques you'll use will vary from project to project, but the basic step-by-step instructions are as follows:

If you made a mistake in your soldering, don't worry. You can undo and fix any problem areas relatively easily. If the problem isn't excess solder, you may be able to resolder over the first joint with new solder.
A more thorough method of correcting a soldering mistake is to reheat the solder you applied and then to use a tool such as a "solder sucker," which is a small syringe-like device that uses vacuum pressure to remove solder. You can also use a solder wick, also called a desoldering braid, which absorbs melted solder by capillary action.
After you finish a soldering session, clean and tin your soldering iron tip. After allowing the iron to cool, store it in a secure location. To further prevent oxidation, especially if you will not be using the iron for a long time, place it in a sealed container.
Now that we've covered the basics, let's look at how to do some specific types of soldering.
You can use a soldering iron to create an electrical connection between two wires. Having a tool, such as a device called a third helping hand, to hold the cables for you is very helpful. A third helping hand consists of a weighted base, metal arms and crocodile clips that hold the wires in place. You can also use a pair of pliers to a similar effect.
Soldering parts onto printed circuit boards (PCBs) is another frequent use of soldering irons.
Solder is what holds the individual pieces of glass in a work of stained glass art together. Here's how you use solder on stained glass.
Some other tips include only using solid-core solder rather than acid-core or rosin-core solder as well as not applying heat for too long in any one area as this can cause the glass to break.
You can solder jewelry using an open-flame torch, which can provide higher temperatures, but can also do so with a soldering iron. The precise techniques vary depending on the kind of item you want to make, and there's more room for creativity with jewelry soldering. Search online for instructions on how to make specific pieces or experiment and create your own designs.
For example, you can bend silver, copper or other types of wire to form rings. You can solder the two ends of the bent wire to create a single ring, or solder multiple rings together to make a necklace or bracelet. Heat the wire where you want to join it and then apply solder.
Some helpful jewelry soldering supplies include high-quality wire cutters and a third helping hand tool.
Click on a category to view a selection of compatible accessories with the Weller WE 1010 1-Channel Soldering Station with soldering iron and safety rest, 120 V.


| Power Supply | 120 V/60 Hz |
| Power | 70 W |
| Temperature | Range: 200 to 850°F (100 to 450°C) Accuracy: ±9°F (±5°C) Stability: ±10°F (±6°C) |
| Display | LCD |
| Channels | 1 |
| ESD Safe | Yes |
| Supplied Tip | ETA |
| Dimensions | 5.91 x 4.92 x 3.94" (150 x 125 x 100 mm) |
| Weight | 3.2 lbs (1.4 kg) |
Soldering is a useful skill to have, whether you plan to use it professionally or for DIY projects. A quality soldering iron is one of the most important tools you'll need for your soldering projects.
This guide will provide a brief overview of how to use a soldering iron. It will give you the basics that apply to most soldering work, as well as tips for specific types of projects.
Although all soldering relies on the same principles, the techniques and tools you use may vary depending on the type of materials you're soldering and the kind of outcome you're intending. On this page, we'll cover step-by-step soldering for wiring, printed circuit boards, stained glass and jewelry.
Here's your introductory guide to using a soldering iron.
The fundamentals of soldering are mostly consistent across project types. Below you'll find information about the basics of soldering, descriptions of the equipment involved and a basic step-by-step guide for how to use a soldering iron.
Soldering is a technique for joining metal parts together. It involves melting a metal known as solder into the space between two metal components. When this solder cools and hardens, it forms a permanent connection between the parts. Solder acts as a sort of metallic glue that joins elements together.
Joining electronic components may be the most common use of soldering irons. You can also use them on piping for plumbing, engine components, arts and crafts projects and more.
This article is about how to use a soldering iron, but the iron itself isn't the only item you'll need. Here's a rundown of some of the supplies you may need to use, including a soldering iron, for a soldering project.
Before you begin using your soldering iron, you'll have to make sure that you've taken all the necessary safety measures and prepared your tools.
Health and safety should always be a priority when soldering. Soldering involves extreme heat and toxic substances. While it involves certain risks, if you take the proper precautions, soldering is a relatively safe activity.
Before getting started, read the instructions as well as the health and safety warnings that come with all of your equipment to ensure you're using it correctly. When soldering, wear safety glasses and keep all hair, loose clothing and jewelry secured and out of the way of your tools. You may also want to wear safety gloves.
Be sure that you are working in a well-ventilated area or use a fume extraction device. The fumes from flux are toxic. If the solder you are using contains lead, wash your hands after you're done working with it.
For your soldering iron tip to work correctly, it needs to be clean and tinned. Any contaminants or oxidation will decrease the efficiency with which it conducts heat, making your job harder and reducing the quality of your solder joints.
Before you start soldering, clean the tip of your iron by rubbing it against your cleaning pad. If your tip is badly oxidized, you may need to apply a tip reactivator. After cleaning or reactivating it, it should appear shiny rather than dull.
Tinning the tip of your iron involves coating it with a layer of solder. This practice protects the tip from oxidation and improves its ability to conduct heat. Tin the tip immediately before you begin soldering.
In addition to cleaning and tinning the tip of your iron before each soldering session, you should also do so after every two or three joints you solder and at the end of each soldering project. This will extend the life of your soldering iron tips and improve the quality of your soldering joints.
Once you've completed the above steps, you're ready to solder your components together. The techniques you'll use will vary from project to project, but the basic step-by-step instructions are as follows:
If you made a mistake in your soldering, don't worry. You can undo and fix any problem areas relatively easily. If the problem isn't excess solder, you may be able to resolder over the first joint with new solder.
A more thorough method of correcting a soldering mistake is to reheat the solder you applied and then to use a tool such as a "solder sucker," which is a small syringe-like device that uses vacuum pressure to remove solder. You can also use a solder wick, also called a desoldering braid, which absorbs melted solder by capillary action.
After you finish a soldering session, clean and tin your soldering iron tip. After allowing the iron to cool, store it in a secure location. To further prevent oxidation, especially if you will not be using the iron for a long time, place it in a sealed container.
Now that we've covered the basics, let's look at how to do some specific types of soldering.
You can use a soldering iron to create an electrical connection between two wires. Having a tool, such as a device called a third helping hand, to hold the cables for you is very helpful. A third helping hand consists of a weighted base, metal arms and crocodile clips that hold the wires in place. You can also use a pair of pliers to a similar effect.
Soldering parts onto printed circuit boards (PCBs) is another frequent use of soldering irons.
Solder is what holds the individual pieces of glass in a work of stained glass art together. Here's how you use solder on stained glass.
Some other tips include only using solid-core solder rather than acid-core or rosin-core solder as well as not applying heat for too long in any one area as this can cause the glass to break.
You can solder jewelry using an open-flame torch, which can provide higher temperatures, but can also do so with a soldering iron. The precise techniques vary depending on the kind of item you want to make, and there's more room for creativity with jewelry soldering. Search online for instructions on how to make specific pieces or experiment and create your own designs.
For example, you can bend silver, copper or other types of wire to form rings. You can solder the two ends of the bent wire to create a single ring, or solder multiple rings together to make a necklace or bracelet. Heat the wire where you want to join it and then apply solder.
Some helpful jewelry soldering supplies include high-quality wire cutters and a third helping hand tool.
Click on a category to view a selection of compatible accessories with the Weller WE 1010 1-Channel Soldering Station with soldering iron and safety rest, 120 V.


